Reports show details and statistics for all your Campaigns and Orders. You can create either a one-time report for immediate download or a scheduled report that is sent to your email address regularly. All reports are exported in Excel format.
You can access this functionality by clicking the Reports icon 
The main Reports listing provides an overview of all generated and scheduled reports, with the following columns:
|
Column |
Description |
|---|---|
|
CATEGORY |
The type of data being exported (e.g., Campaigns, Orders, or Clients). |
|
NAME |
The descriptive name you assigned to the report. |
|
TIME PERIOD |
The date range covered by the report. |
|
SCHEDULED |
For scheduled reports, this shows the frequency (e.g., Daily, First day of the week). |
|
CREATED |
The date the report was initially created. |
|
CREATED BY |
The user who created the report. |
|
STATUS |
The current state of the report (e.g., GENERATING, COMPLETED). |

Create a report
To begin, click New Report. This will take you to the Report details screen to configure the report's basic settings.
-
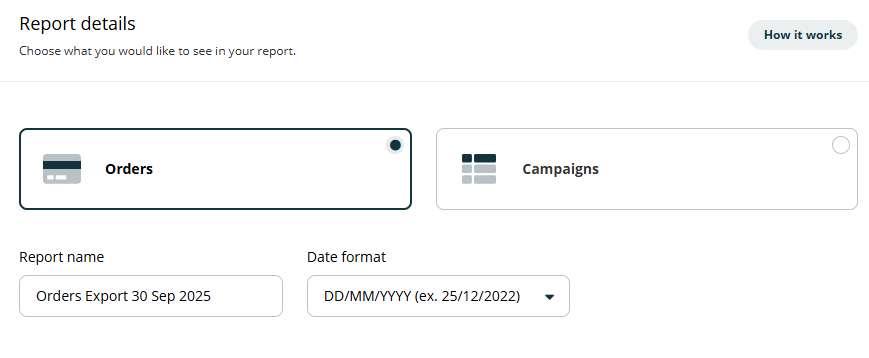
Select Data Category: Choose the primary data set for your report. Options include:
-
Orders
-
Campaigns
-
Clients (This option is available if you are an Agency user).
-
Report Name: Enter a descriptive name for your report. A default name is automatically suggested based on the category and current date.
-
Date Format: Select your preferred date format for the exported report (e.g., DD/MM/YYYY).
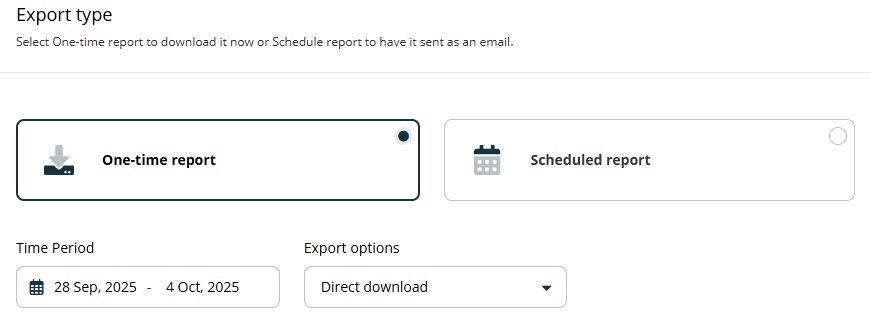
After setting these details, you will choose the Export type.
One-time Report
Select One-time report to generate and receive the data immediately.
-
Time Period: Define the date range for the data by entering a Start date and End date.
-
Export Options: Choose how you want to receive the report:
|
Option |
Description |
|---|---|
|
Direct download |
The report will be downloaded by your browser as soon as it is ready. |
|
Send by email |
The report will be sent to your registered email address as an attachment. |
Click Save. The report status will show as GENERATING and will change to COMPLETED when it is ready for download.
Scheduled report
Select Scheduled report to automatically receive the report via email on a regular basis.

-
Time Period: Choose the date range the report should cover for each occurrence (e.g., Last week, Last month).
-
Frequency: This value is determined automatically by the Time Period you select. For example, choosing Last week sets the frequency to First day of the week.
-
Recipients: The report will be sent to the email address associated with your account.
Click Save. The new scheduled report will begin to be sent according to the set frequency.
Frequently Asked Questions
Q: What format are the reports in?
A: All reports are exported in Excel format.
Q: What is the difference between a One-time and a Scheduled report?
A: A One-time report is generated immediately for a specific date range you define. A Scheduled report is sent to you automatically on a recurring basis (e.g., weekly, monthly) and covers a relative time period (e.g., Last week).
Q: How do I get my completed One-time report?
A: If you chose Direct download, it will download in your browser. Otherwise, it will be in your email. You can also find it in the Reports listing and download it from there once its status is COMPLETED.
Q: Can I send a scheduled report to a different email address?
A: No. The scheduled report is automatically sent to the email address associated with your user account in the platform.