You create Campaigns in the Campaign Wizard.
To get going, from pretty much any page select the Create Campaign button in the header.

If you are an Agency, you first select a Client. If you are advertising for your own company you will not see this option.
-
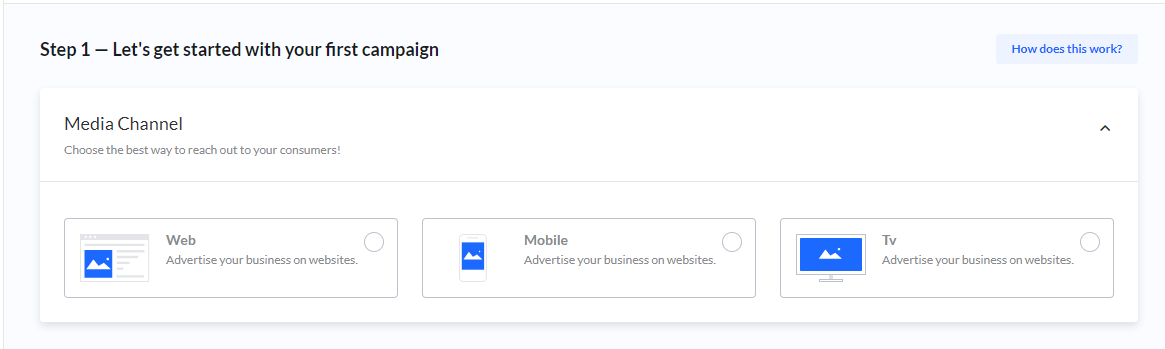
Step 1: Campaign options
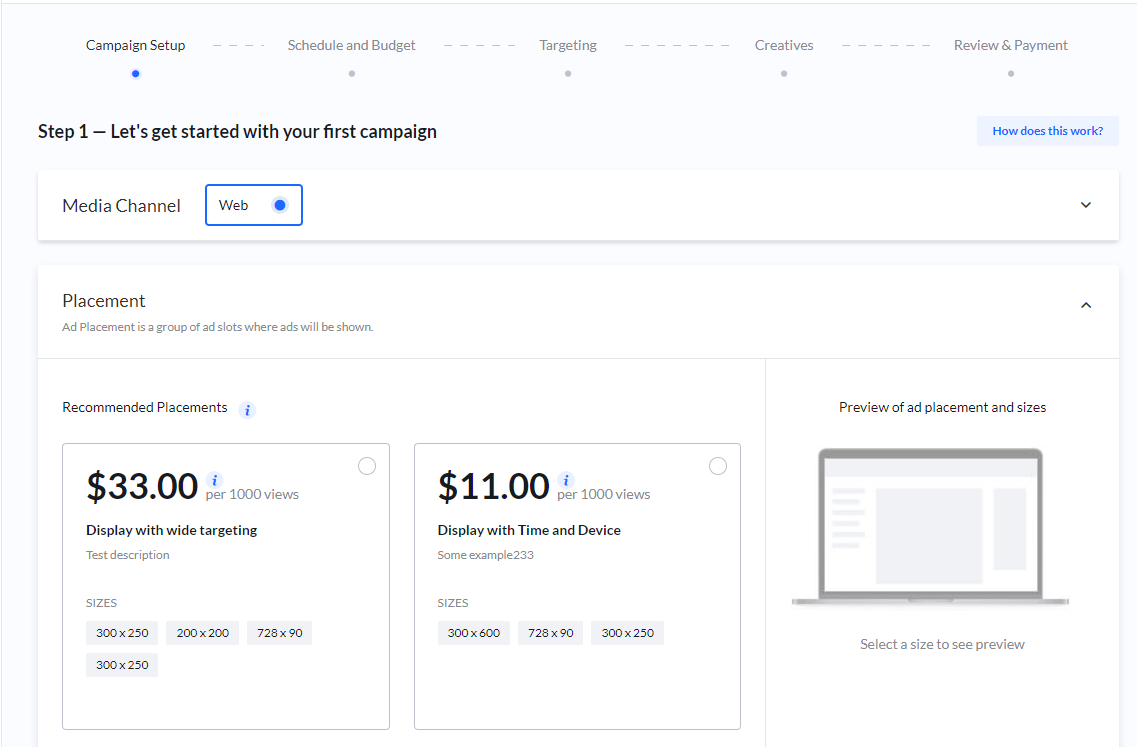
The Campaign wizard guides you through a couple of steps with different options to choose from. The options available on this first step may vary depending on the platform's setup (e.g., choosing between different media channels).
-
As you make your selections, new options are shown.
-
Your selections will result in one or several Products or placements that match. The first Products shown are Recommended.
-
If you scroll down, you can see all available Products.
-
Select the Product most relevant to you, paying close attention to its price description.
-
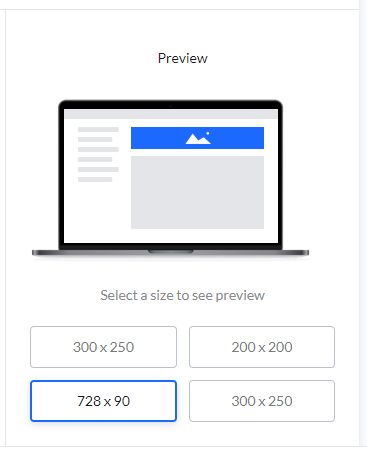
When you select a Product, you can preview the available sizes/ad-slots in the side panel.
-
To move forward in the wizard, click Next.
Pricing Models Explained
|
Price Model |
Description |
|---|---|
|
Price per day (CPD) |
You buy a percentage of all available ad impressions for a limited number of days. The percentage is also known as SOV (Share-of-Voice). 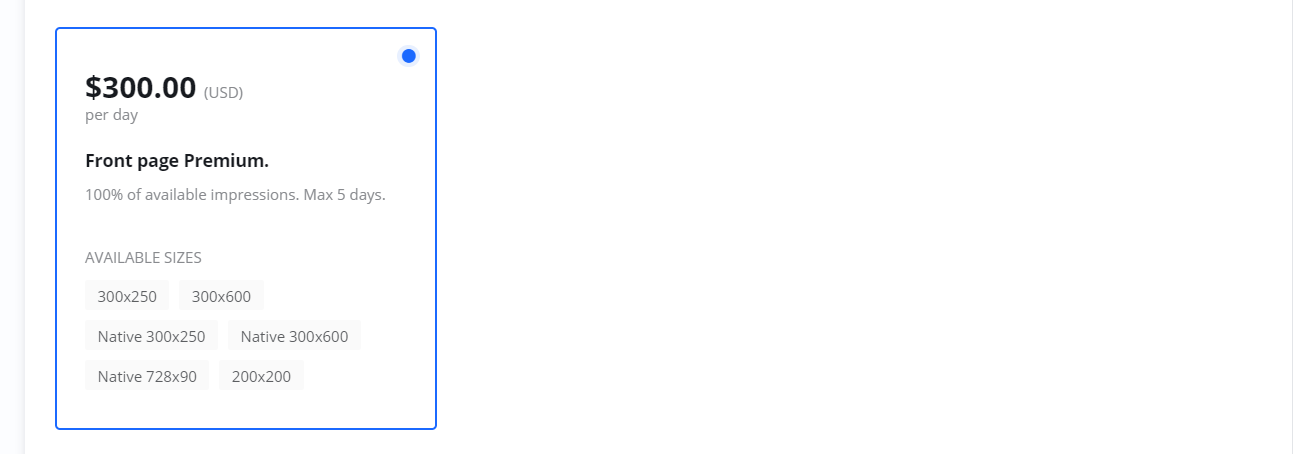
|
|
Price per click (CPC) |
You only pay when someone clicks on your ads. 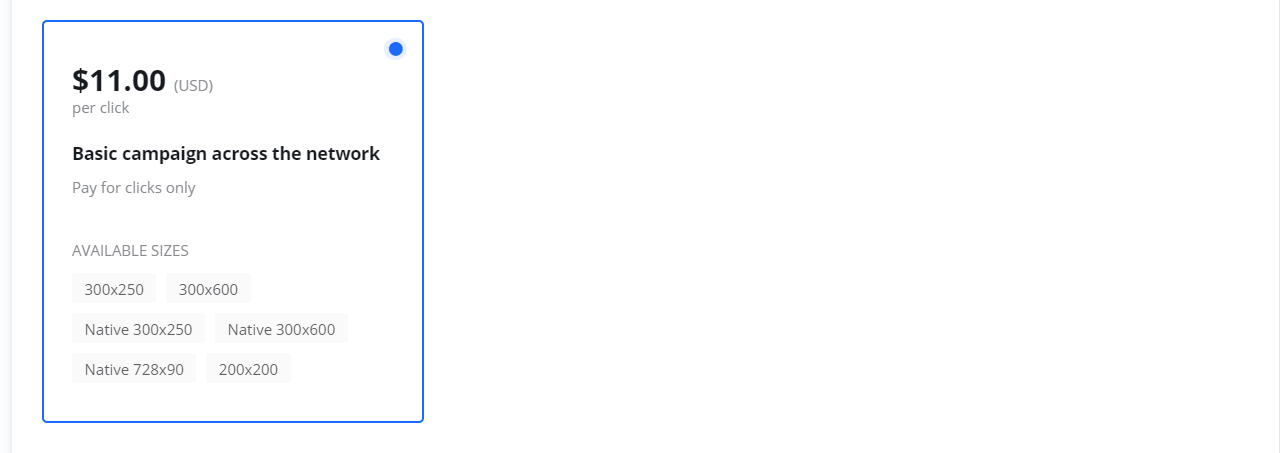
|
|
Price per 1000 impressions (CPM) |
You buy impressions to reach as many viewers as possible. Also known as Cost-Per-Mille. 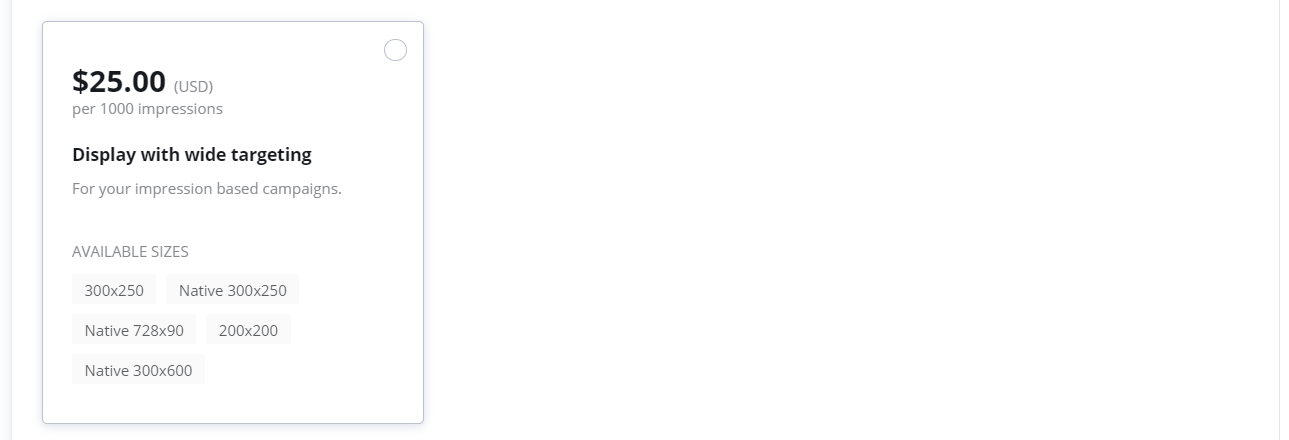
|
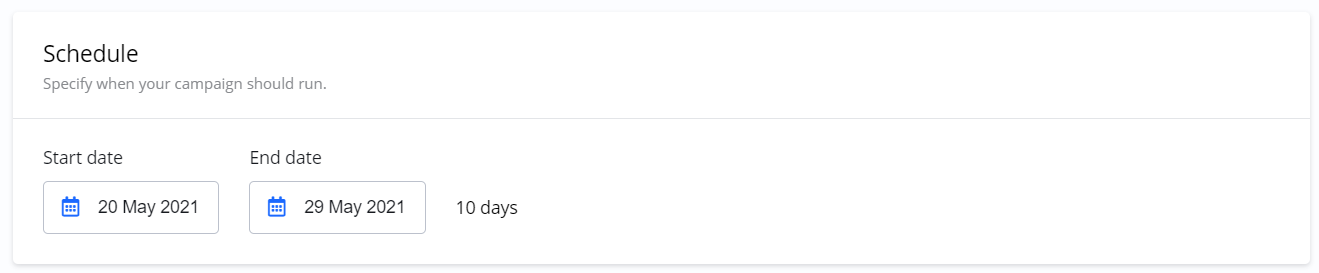
Schedule and budget
Schedule and Budget is often Step 2 in the Campaign wizard. Remember, depending on the Product you selected, your options for each step might be different.
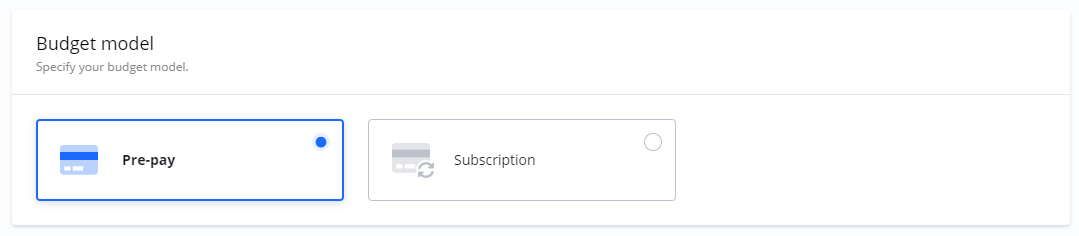
Budget model
These are the options for how you wish to pay. If available, you can choose between Pre-pay or Subscription.
-
Pre-pay / Invoice: This means you will pay for your Campaign upfront by card or by invoice. You will set the Start and End date. You can always change the dates until you have checked out the Campaign. After checkout, you can only change the end date.
-
Note on Delivery: For Pre-pay Campaigns, you only pay for what was actually delivered. For example, if you set a budget of $900 and the Campaign delivers less, you will receive a refund for the undelivered portion.
Budget
Depending on the Price and Budget models you choose, the options for Budget will be different.
|
Campaign & Budget Model |
Budgeting Method |
|---|---|
|
Impression-based (CPM) |
You can switch between setting the budget in money or in a total number of impressions. 
|
|
Impression-based (CPM) - Subscription |
You set the daily budget for recurring payments. 
|
|
Click-based (CPC) |
You can switch between setting the budget in money or in a total number of clicks. 
|
|
Click-based (CPC) - Subscription |
You set the daily budget for recurring payments. 
|
|
Share-of-Voice (CPD) |
The number of days you select determines your budget. For example, a Campaign with a price of $1,600 per day running for two days will have a budget of $3,200. 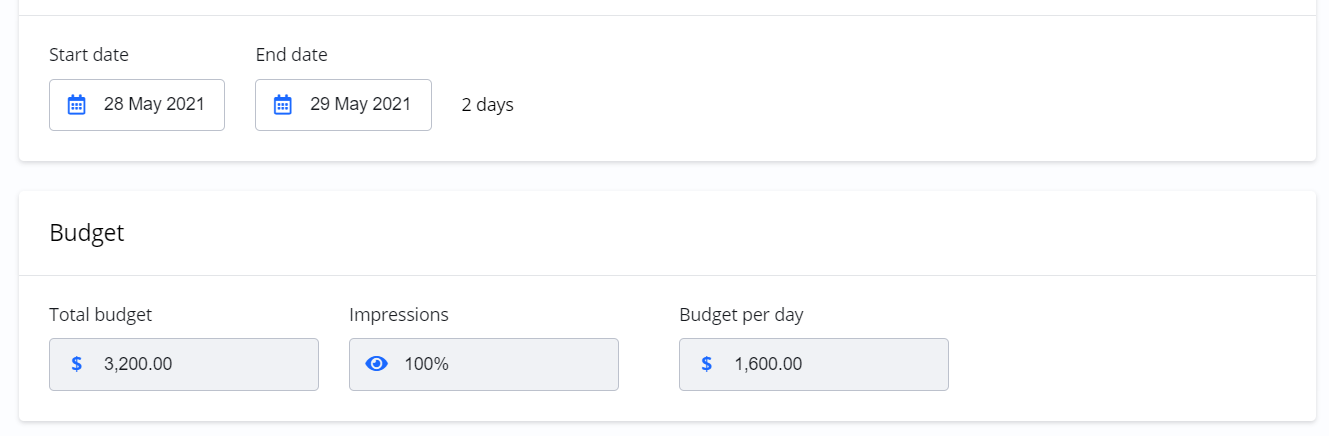
|
Please note: For CPD Campaigns, there is often a limit on the number of days you can run your Campaign. You will be notified if you select more days than the limit.
Availability
If you have selected the pre-pay option, the platform checks for ad inventory availability continuously between each step of the wizard. You will be notified if availability is high or limited.
If availability is high: This is good news. You can consider increasing your budget, extending your Campaign period, or narrowing your Targeting for a more specific audience.
If availability is low: If availability is too low to proceed, you can try adjusting your schedule, lowering your budget, or broadening your Targeting.
Targeting options
Next step(s) when creating your Campaigns is Targeting. This is where you control where, when, to whom, and how often your ads are shown. Remember, depending on the Product you selected, your options for each step might be different.
For a more complete description of Targeting check the Targeting section.
Targeting Methods
-
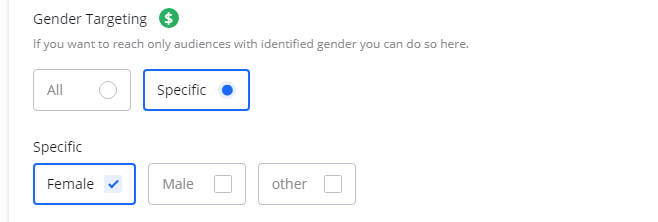
Add-on Prices: Some Targeting options might have additional costs. You can identify these by a green $-icon next to the Targeting name.
-
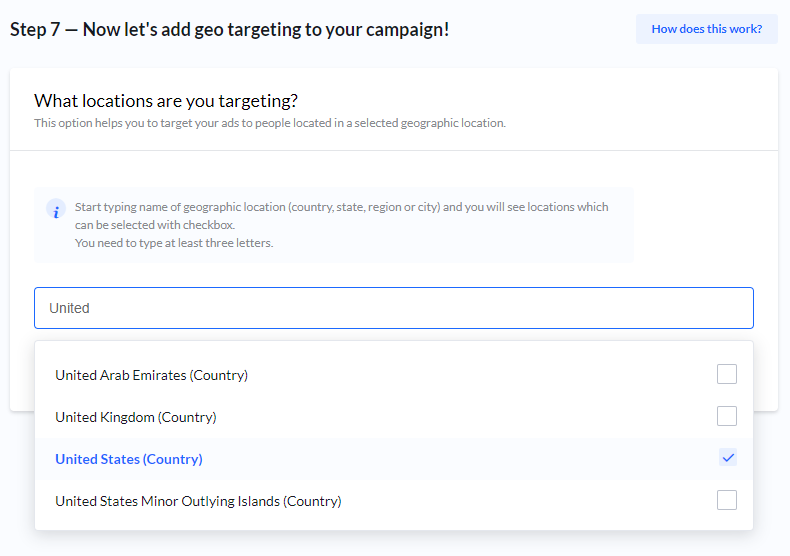
Geography: Probably the most commonly used method. Specify the geographic locations where your ads should be shown.
-
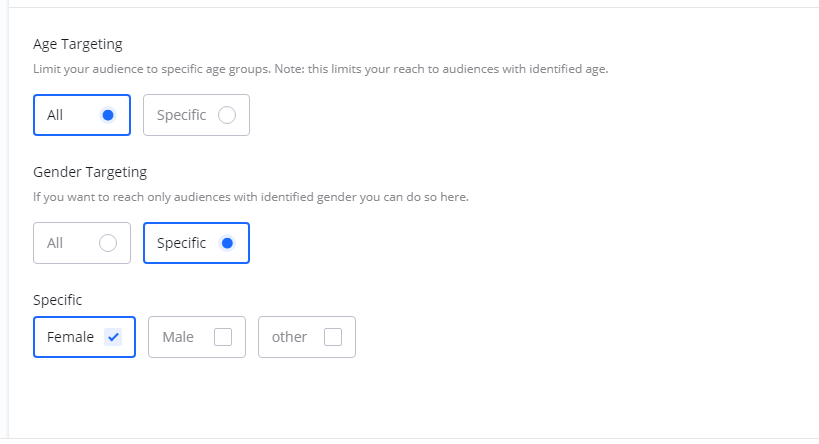
Age and Gender: If available, you can set Age and Gender Targeting. Note: This limits your reach to audiences identified with a specific age and gender. To reach everyone, or if delivery is low, consider setting these to All.
-
Time scheduling: Set specific schedules if you want your ad to be shown only on specific days of the week and at specific times.
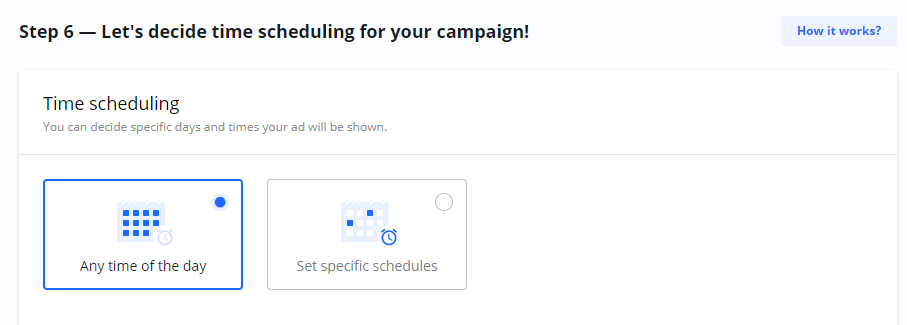

Example of a Campaign scheduled to run only on Friday afternoons and weekends in the morning -
Frequency capping: Limit the number of times your ad is shown to the same user.

-
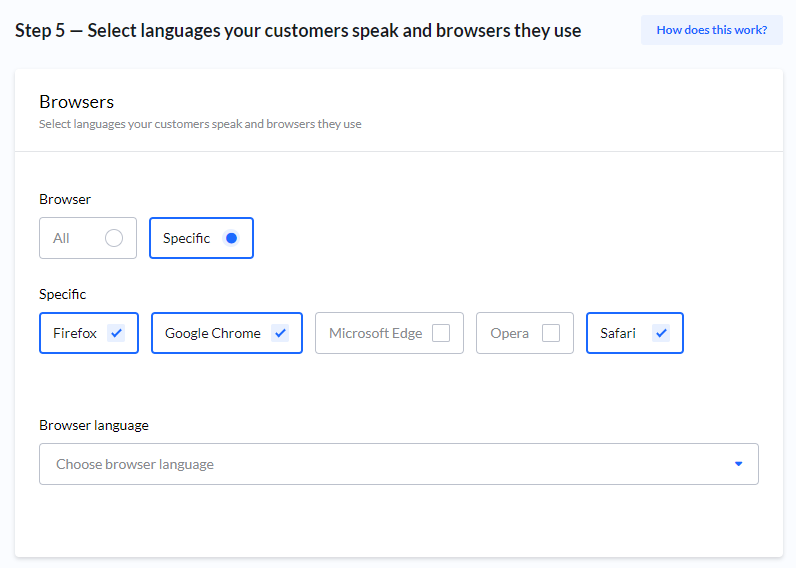
Browser type and Browser Language: Optional targeting settings.
-
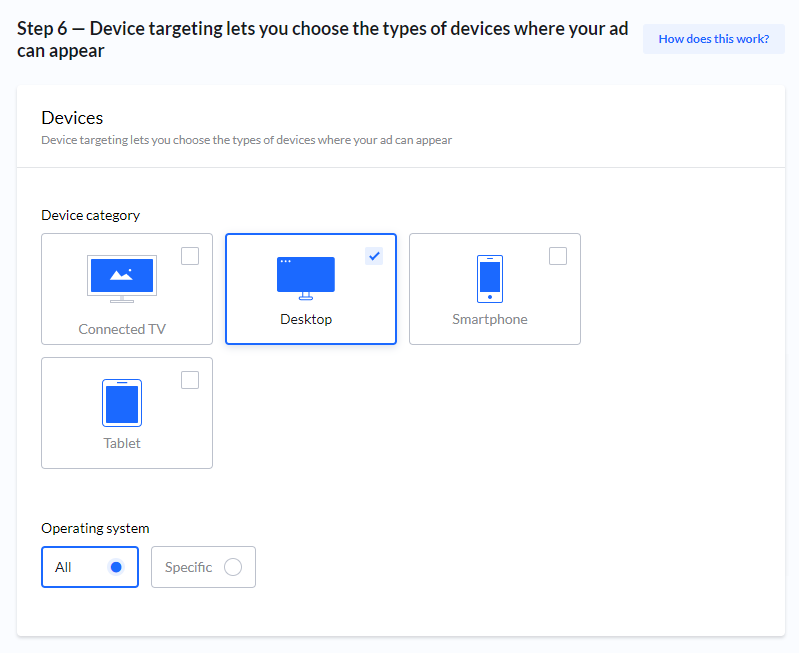
Device category and Operating system: Optional targeting settings, if available.
Add-on prices for Targeting
Some Targeting options might have additional costs. You can identify these by a green $-icon next to the Targeting name. For example here where Gender Targeting has an add-on price.
Geography
Geography Targeting is probably the most commonly used Targeting method. Here you can specify if your ads should be shown only to audiences viewing your ad from specific locations.
Age and Gender
If available you can set Age and Gender Targeting.
Time scheduling
Under Time scheduling you can set specific schedules if want your ad to be shown only on specific days of the week, and specific times during those days.
For example, here is a Campaign scheduled to run only on Friday afternoons and weekends in the morning:
Frequency capping
Frequency capping is a setting which objective is to limit the times your ad is shown to the same user.
Browser type and Browser Language
You can set Browser type and Language, both optional.
Device category and Operating system
If available, you can select Device category and Operating system, both optional.
Creatives
After Targeting, you can add your Creatives. Creatives are the actual ads that will be shown to your audience. You can add a Creative directly or skip this step and add it later.
For a more complete description of Creatives, check the Creatives section.
Review - Final step!
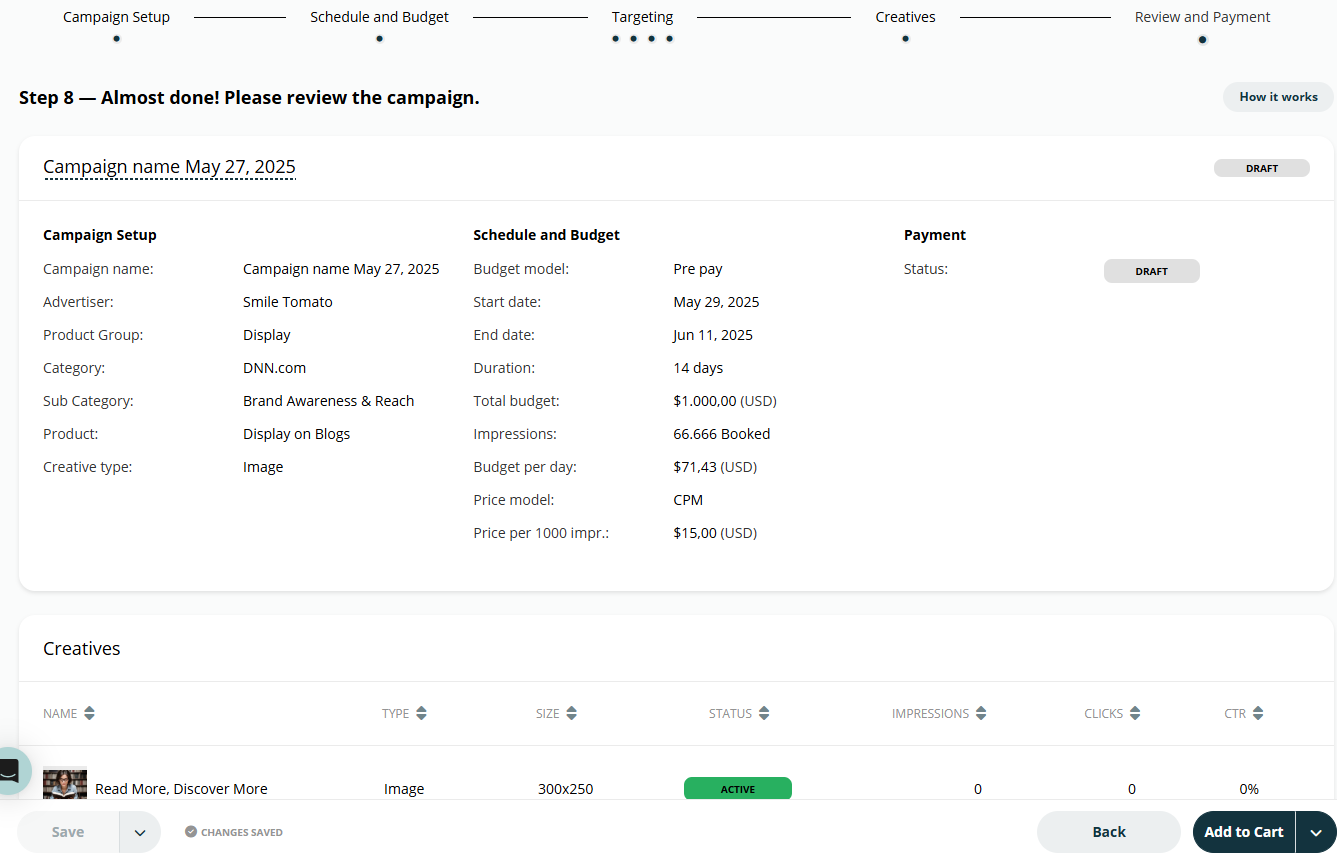
When you are done with your Campaign, you can either Add to Cart directly or go Back to make any necessary adjustments before adding the Campaign to your Shopping Cart.
Campaign status
Campaigns are stored automatically at the Budget and Targeting steps in the wizard. The status of a Campaign changes as it progresses:
-
DRAFT: New Campaigns that have not been checked out.
-
PENDING: Campaigns that have been checked out but have not yet started.
-
LIVE: Campaigns that have reached their start date and have at least one approved Creative.
Checkout
Read all about your checkout options here.
Frequently Asked Questions
Q: What are the main pricing models for Campaigns?
A: The three main models are CPD (Cost-Per-Day), where you buy a share of daily impressions; CPC (Cost-Per-Click), where you pay for each click; and CPM (Cost-Per-Mille), where you pay per 1000 impressions.
Q: What is the difference between Pre-pay and Subscription?
A: Pre-pay means you pay for the entire Campaign upfront. Subscription means you pay on a recurring basis (e.g., weekly) for the duration of the Campaign.
Q: What should I do if my ad availability is low?
A: You can try to increase availability by broadening your Targeting options, adjusting your schedule, or lowering your budget.
Q: When does a Campaign's status become LIVE?
A: A Campaign becomes LIVE once its scheduled start date is reached AND it has at least one approved Creative associated with it.